Mac Single User Mode Read Only File System
There'southward no need to panic if your Mac won't start. macOS includes some simple fixes that can help go everything right straight away. You don't need to take your machine to a service center for repair yet. Salvage yourself time and coin by trying to fix it yourself.
We'll show you how to use features like Deejay Utility's Showtime Aid, fsck, and tools congenital into macOS recovery to revive a Mac that refuses to start.
Before We Begin
These tips are for instances where your Mac refuses to boot. You might meet a blackness screen, y'all could become an error message, or your computer may hang on the white Apple tree logo. If your machine is running fine, this troubleshooting guide is not for y'all.
If you doubtable issues with your startup bulldoze due to operation issues or erratic behavior, running Commencement Aid certainly won't hurt. But first, doesn't it make sense to ask what First Assistance really does?
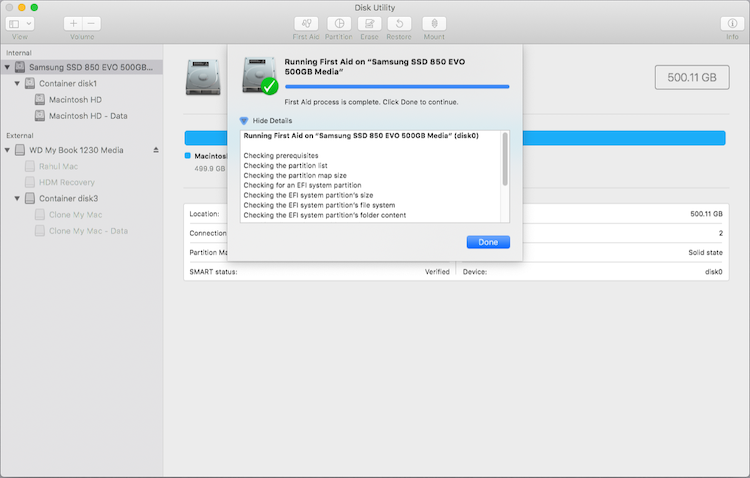
When your Mac starts up, it performs a quick consistency check to scan the startup deejay and to verify the sectionalisation scheme (the space where volumes be) and volume directory structure (which catalogs the stored files and folders).
Launch Disk Utility and click First Aid followed by Run, selecting volumes in the following social club:
- Macintosh HD - Data
- Macintosh HD (bold yous haven't renamed the startup volume)
- Container disk
- SSD
If First Aid finds any errors, it'll endeavor to automatically prepare them.
1. Try Condom Fashion
"Prophylactic Manner" provides y'all a starting point to help yous determine whether an upshot is caused by software that loads as your Mac starts up or a hardware trouble. Booting your Mac in Prophylactic mode verifies your startup disk and repairs directory issues, if needed.
It loads only the bare minimum system extensions, leaving behind 3rd-party kernel extensions and login items while immigration font, kernel, or other system caches. If the effect returns subsequently leaving Condom Mode, you'll know where to start looking for culprits. To boot into Safe Style, follow the sequences beneath
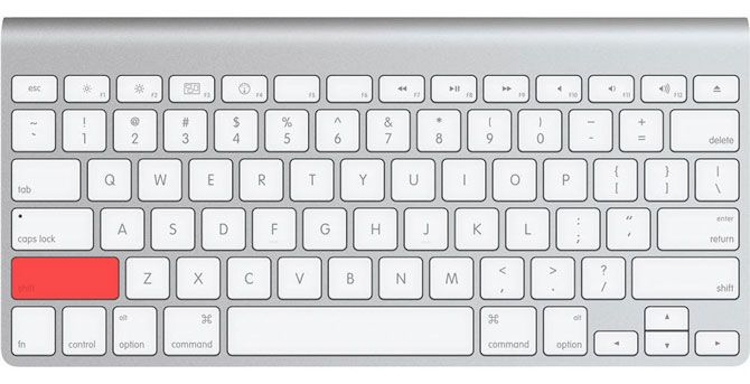
Intel Macs: Turn on or restart your Mac, and then immediately press and agree the Shift key. A Mac in Condom Mode shows the words "Safe Boot" in bright carmine text at the upper corner of the login screen.
Apple Silicon Macs: Shut downwards your Mac. Press and hold the power button (for at least 10 seconds), until your Mac displays the startup options window. Select your startup disk, then press and agree the Shift primal. Click Proceed in Safe Mode or press Return.
If y'all're finding it difficult to find the specific component, try Verbose mode by property Cmd + V on startup and scan the startup procedure. Restart into Safe Mode, remove the component, then endeavor once again.
2. Repair Your Disk in macOS Recovery
Every Mac ships with macOS Recovery, which lives on a divide partition on the startup disk. This manner allows yous to repair or restore the startup bulldoze, admission the Terminal, and reinstall macOS. To boot into macOS recovery, follow the beneath steps:
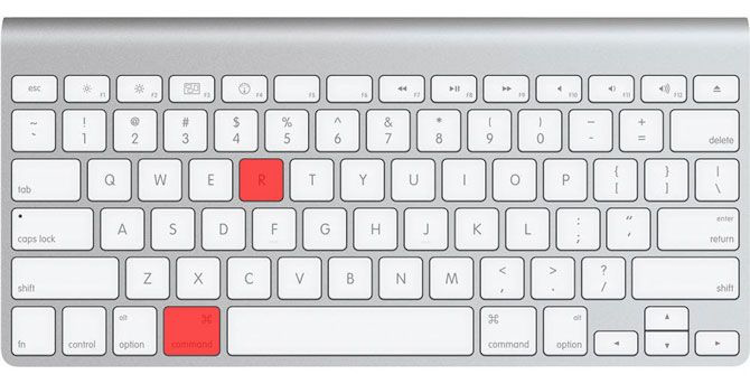
Intel Macs: Restart or plow on your Mac, then immediately press and hold Cmd + R. Release the keys when your Mac displays anything on the screen. If you've ready a firmware password, y'all must provide it to access recovery mode.
M1 Macs: Shut down your Mac. Press and hold the power push until you lot see a prompt that says "Loading startup options." A set of one or more drives should appear along with a gear icon labeled Options. Select Options, then press Return.
One time you're in macOS Recovery, launch Deejay Utility and proceed to run First Assist as discussed above. If Safe Mode didn't set up your outcome, performing this step should repair your disk and file system, which may not exist possible when you use them as a startup drive.
Trouble Booting Into macOS Recovery?
If you have problem booting into macOS Recovery, perhaps due to problem with your drive, you can outset macOS Recovery over the internet (by holding Cmd + Selection + R) or from the recovery volume located on an external drive instead.
Once again, it depends on the type of Mac you ain. In Macs with the M1 bit, in that location are no restrictions for booting from external volumes since each volume has its ain security settings. Just in Intel Macs with the T2 chip, information technology's necessary to enable "booting from external media."
3. Apply fsck in Single User Mode
If Safe Fashion or performing start aid in macOS Recovery didn't ready your problems, we'll utilize fsck (file organization consistency check). It'due south a pop Unix tool for checking and fixing drive problems. Single-User mode allows you to make changes to shared user resources.
It doesn't attempt to boot macOS, just just provides admission to Unix command line. To kick into Single-User way, start your Mac in macOS Recovery and cull Utilities > Terminal. This procedure applies to both Intel and M1 Macs.
For older Macs, printing and hold Cmd + South when your computer boots. If you have set a firmware password, so Single-User mode is not available to you. When you're in the Concluding, blazon the following and hit Return:
/sbin/fsck -fy (Wherein "f" means that it'll strength the utility to cheque the bulldoze file system, and "y" means it'll automatically ostend the actions of fsck control.)
Depending on the size of your book, information technology may take a while for this procedure to complete. Echo this commmand until you see the bulletin "The volume Macintosh HD appears to be OK."
And then, run:
/sbin/mountain -uw This will mount the startup volume as a read-and-write file arrangement. Once yous're done, run the get out control to kickoff up the Mac.
Withal Can't Boot Your Mac?
If your Mac all the same won't kick after running First Aid and fsck, you may take some serious bug with your drive. At this stage, it'south appropriate to support your files and run Apple tree Diagnostics to meet if in that location are whatsoever obvious problems.
Target Deejay Mode
Since this characteristic is built into Intel-based Macs, y'all can apply it to recover data even if the installed macOS volume is corrupted. Hither'due south a quick on how to recover files with Target Disk Mode.
Note: M1 Macs employ Share Deejay instead of Target Deejay Fashion. To employ this, restart in macOS Recovery, and then cull Utilities > Share Deejay. Select your startup deejay, and click Outset Sharing. Connect your Mac to another Mac via USB cable and you'll come across the shared disk in Finder sidebar.
Create an Image of the Deejay
Y'all tin even create an image of the faulty drive, for which yous'll need to connect a spare external bulldoze that's at least every bit large equally the startup disk. Boot your Mac into macOS Recovery, then launch Deejay Utility. From the card bar, cull File > New Epitome > Prototype from "Macintosh HD". Specify your external drive and start the procedure.
This may take a while, and at that place'due south no guarnatee that the process will exist a success. On completion, it'll create a DMG file of your former drive that you can mount and sort through at your convenience.
Copy Your Files Manually
You have the option to manually copy files. Start your Mac in macOS Recovery and launch Concluding. Then connect the external drive yous want to use equally a destination for your files.
Run the cp -r command. For example, cp -r /Volumes/Macintosh\ HD/Users/[username]/Documents /Volumes/Backup/**.
Hither, cp is the copy command, and -r runs this control recursively. That means it'll copy all directories inside the directory you specify, so the directories within them, and and then on.
The first path is the location of the files. Note the backslash (\) in the path name, which you employ to specify locations that have spaces in their name. The second path is the location of your external drive, which will ever be in /Volumes/ with whatever label you've given (in this case, the drive is called Backup).
The Importance of Backing Up Your Mac
Hopefully, y'all're able to recover your drive or whatever of import files you may need. Even with a successful recovery, and the many tools we've discussed at your disposal, at that place's aught quite similar the peace of mind a recent backup provides.
You don't fifty-fifty have to use Time Automobile to keep your Mac rubber. Why not try ane of the many other Mac fill-in tools available to backup your Mac.
About The Author 
giddingsdigetund66.blogspot.com
Source: https://www.makeuseof.com/tag/repair-mac-disk-safe-mode-fsck/
Belum ada Komentar untuk "Mac Single User Mode Read Only File System"
Posting Komentar